---
page_source: https://docs.juspay.io/juspay-sdk-integration/android/sample-project-setup/backend-setup
page_title: Backend Setup
---
# Generate Keys and Run Sample Project
Merchant must securely generate 2048 bit RSA Public Private Key pair on their servers inside a crypto vault. Merchant must share the Public Key (Key Format-PEM) with juspay during onboarding.
This public-private key pair is crucial for running the project securely.
> **Warning**
> Private key must be securely kept in a crypto vault on the merchant servers. Private key should never flow to the client.
## 1. Generate the Keys
Two sets of Public-Private key pairs are required for encryption. You will generate one such pair and juspay will generate the other pair.
For generating your public-private key, there are two approaches as mentioned below:
### Option 1 Generate the Keys on Juspay Dashboard
1. Login to [Juspay Dashboard](https://sandbox.portal.juspay.in/) and navigate to JWT Keys
Login → Payments → Settings → Security → JWT Keys
2. Click on ‘Upload New JWT’ button

3. Click on ‘I don’t have the JWT Keys, I want to auto generate the keys’ as shown below:

4. Click on ‘Auto Generate Keys’ button as shown below:

5. This will auto-download your Private Key and Juspay’s Public Key in your ‘Downloads’ folder as shown below:

Please note the description of the downloaded parameters below
1. **‘privateKey.pem’** _- Y_ our Private Key
2. **‘key_91e09ab9d5154f569bb2b4ac54d6ee7f.pem’** _-_ Juspay’s Public Key
3. **‘config.json’** _-_ contains file paths of your keys as well as values for Merchant_ID and Payment_Page_Client_ID
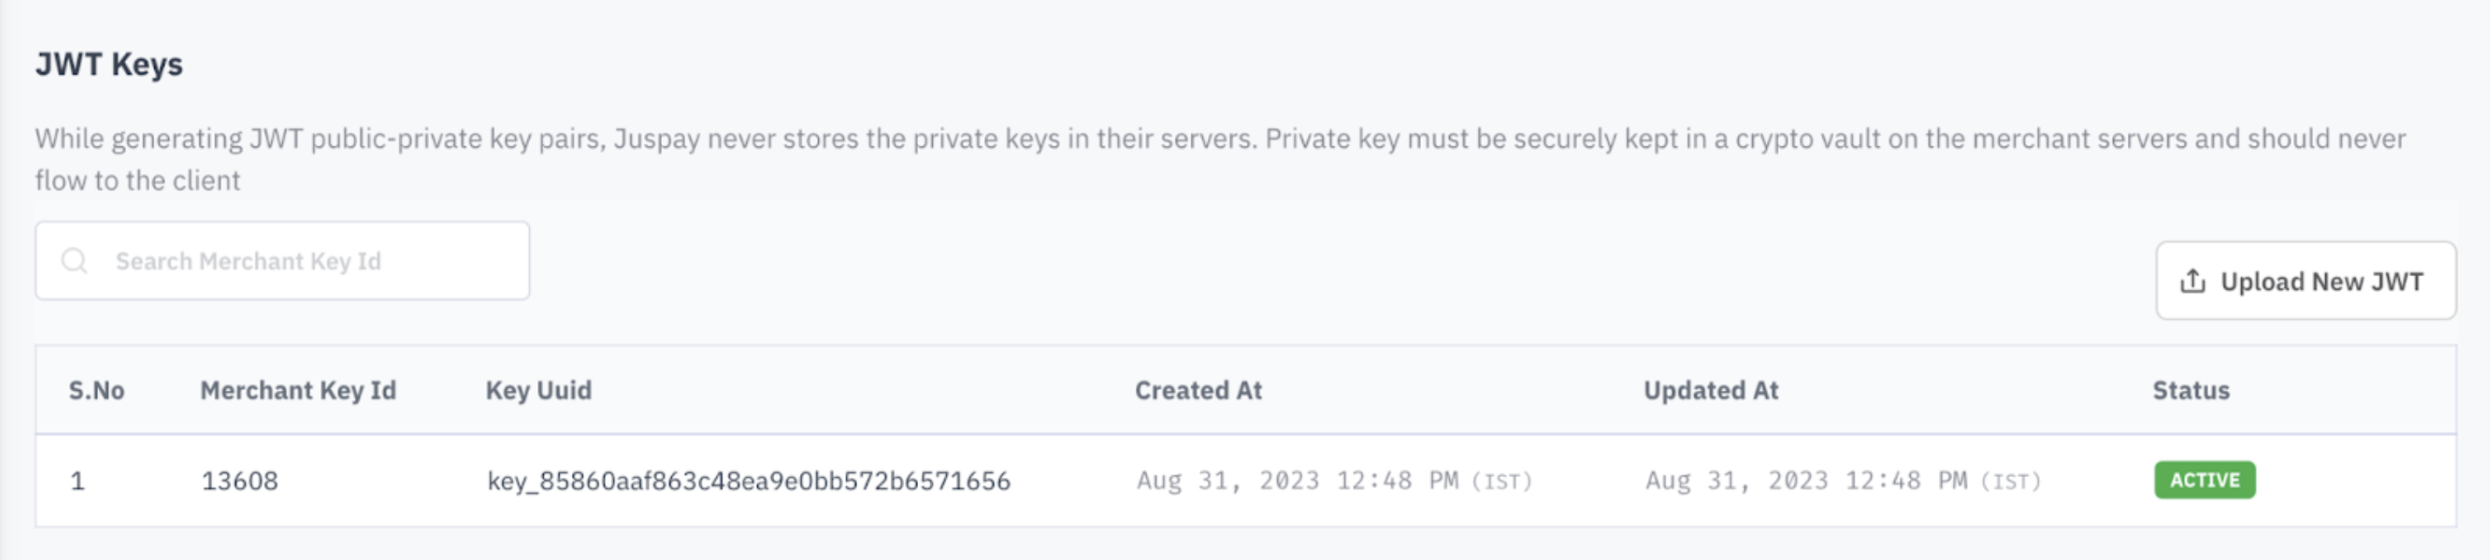
6. Juspay’s Key Uuid will appear on the Juspay Dashboard as shown below:
### Option 2 Generate the Keys on your Local System
1. **Private Key** : Run the following Command line in your ‘Terminal’ to generate a private key file(private-key.pem):
`openssl genrsa -out private-key.pem 2048`
2. **Public Key** : Run the following Command line in your ‘Terminal’ to generate a public key file(public-key.pem) for the private key file generated in the previous step:
`openssl rsa -in private-key.pem -pubout -out public-key.pem`
3. Upload your Public key(public-key.pem), generated in the previous step, on the [Juspay Dashboard](https://sandbox.portal.juspay.in/)
4. Once uploaded, juspay will auto-generate the other Public-Private key pair. Juspay’s Private key will be stored securely at Juspay’s end.
Juspay’s Public key will get auto-downloaded in your ‘Downloads’ folder (Example: key_aa**bb.pem file will get auto-downloaded). Juspay’s Key Uuid will appear on Juspay Dashboard.

## 2. Run the Sample Project
### Step 2.1 Download the Sample Project file for PHP
Click [here](/repository/downloadGithubFile?repository=https://github.com/juspay/juspay-sdk-integration-demo/archive/refs/heads/expresscheckout-php-sdk.zip) or click on the ‘Download’ button on the top right hand side of the page
#### Code Snippets: -
#### PHP Code Snippet:
```php
# How to use this repo#
### What is this repository for? ###
* This repo is being used for Juspay Documentation made using tesseract repo
* This directory contains demo integration project for Juspay's suite of products
Refer to our [Developer Docs](https://docs.juspay.in/) for details around the integration process.
### Maintained Examples
| Folder Name | Product | Platform |
|------------------------------|------------------------------------------|--------------------------------------------|
| api-reference | Collection of APIs used across products | Agnostic |
| ec-headless-sample | Express Checkout SDK | Andriod, iOS, Flutter, React, Cordova |
| payment-page-android | Payment Page | Android |
| payment-page-ios | Payment Page | iOS |
| payment-page-web | Payment Page | Web |
| payment-page-flutter | Payment Page | Flutter |
| payment-page-cordova | Payment page | Cordova |
| payment-page-react-native | Payment page | React Native |
| payment-page-payment-locking | Payment locking feature for Payment Page | Andriod, iOS, Flutter, React, Cordova |
| payv3-forms | payv3 | Web |
| payment-page-sample-payload | Sample payload for payment page | Andriod, iOS, Flutter, React, Cordova, Web |
### How do I get set up? ###
* This repo is used to show the code section of the documentation.
### Contribution guidelines ###
* If you want to add any new product and/or platform. please follow the below steps.
1. All the code content of a particular platform of a product is kept in a branch "productName" + "-" + "platformName".
Let suppose you are adding code for platform android in the product payment-page then the name of the branch will be
payment-page-android
2. And payment-page-android code have both Java and Kotlin so there will be two folders named accordingly and each folder should contain their demo code.
```
### Step 2.2 Input File Paths for Keys in 'config.json' file
**Option 1** -
Step 1 : Open the PHP project in your PHP environment and **replace** the config.json file already present in the project folder with the config.json file downloaded from the dashboard.
Step 2 : Add your private key (‘**privateKey.pem’)** and Juspay’s public key **(‘key_91e09ab9d5154f569bb2b4ac54d6ee7f.pem’ )** to the**** PHP project folder
**Option 2** - Open the PHP project in your PHP environment and input the file paths in following keys:
| Parameter | Description |
|---|---|
| PRIVATE_KEY_PATH | Add the file path for your private key |
| PUBLIC_KEY_PATH | Add the file path for Juspay’s public key obtained from the dashboard |
| KEY_UUID | Add the Key_Uuid present in the dashboard |
| MERCHANT_ID | Add the Merchant_ID provided by Juspay |
| PAYMENT_PAGE_CLIENT_ID | Add the Client_ID provided by Juspay. Kindly reach out to JUSPAY SPOC in case of queries. |
#### Code Snippets: -
#### PHP Code Snippet:
```php
{"success":false,"message":"No Data found for the given path"}
```
### Step 2.3 Install System Dependencies
Run ‘php setup.php’ to install all system dependencies
#### Code Snippets: -
#### PHP Code Snippet:
```php
# How to use this repo#
### What is this repository for? ###
* This repo is being used for Juspay Documentation made using tesseract repo
* This directory contains demo integration project for Juspay's suite of products
Refer to our [Developer Docs](https://docs.juspay.in/) for details around the integration process.
### Maintained Examples
| Folder Name | Product | Platform |
|------------------------------|------------------------------------------|--------------------------------------------|
| api-reference | Collection of APIs used across products | Agnostic |
| ec-headless-sample | Express Checkout SDK | Andriod, iOS, Flutter, React, Cordova |
| payment-page-android | Payment Page | Android |
| payment-page-ios | Payment Page | iOS |
| payment-page-web | Payment Page | Web |
| payment-page-flutter | Payment Page | Flutter |
| payment-page-cordova | Payment page | Cordova |
| payment-page-react-native | Payment page | React Native |
| payment-page-payment-locking | Payment locking feature for Payment Page | Andriod, iOS, Flutter, React, Cordova |
| payv3-forms | payv3 | Web |
| payment-page-sample-payload | Sample payload for payment page | Andriod, iOS, Flutter, React, Cordova, Web |
### How do I get set up? ###
* This repo is used to show the code section of the documentation.
### Contribution guidelines ###
* If you want to add any new product and/or platform. please follow the below steps.
1. All the code content of a particular platform of a product is kept in a branch "productName" + "-" + "platformName".
Let suppose you are adding code for platform android in the product payment-page then the name of the branch will be
payment-page-android
2. And payment-page-android code have both Java and Kotlin so there will be two folders named accordingly and each folder should contain their demo code.
```
### Step 2.4 Run the Server
1. run **‘composer run_server’** to run the server
2. In browser load the website ([localhost:5000](http://localhost:5000))
#### Code Snippets: -
#### PHP Code Snippet:
```php
# How to use this repo#
### What is this repository for? ###
* This repo is being used for Juspay Documentation made using tesseract repo
* This directory contains demo integration project for Juspay's suite of products
Refer to our [Developer Docs](https://docs.juspay.in/) for details around the integration process.
### Maintained Examples
| Folder Name | Product | Platform |
|------------------------------|------------------------------------------|--------------------------------------------|
| api-reference | Collection of APIs used across products | Agnostic |
| ec-headless-sample | Express Checkout SDK | Andriod, iOS, Flutter, React, Cordova |
| payment-page-android | Payment Page | Android |
| payment-page-ios | Payment Page | iOS |
| payment-page-web | Payment Page | Web |
| payment-page-flutter | Payment Page | Flutter |
| payment-page-cordova | Payment page | Cordova |
| payment-page-react-native | Payment page | React Native |
| payment-page-payment-locking | Payment locking feature for Payment Page | Andriod, iOS, Flutter, React, Cordova |
| payv3-forms | payv3 | Web |
| payment-page-sample-payload | Sample payload for payment page | Andriod, iOS, Flutter, React, Cordova, Web |
### How do I get set up? ###
* This repo is used to show the code section of the documentation.
### Contribution guidelines ###
* If you want to add any new product and/or platform. please follow the below steps.
1. All the code content of a particular platform of a product is kept in a branch "productName" + "-" + "platformName".
Let suppose you are adding code for platform android in the product payment-page then the name of the branch will be
payment-page-android
2. And payment-page-android code have both Java and Kotlin so there will be two folders named accordingly and each folder should contain their demo code.
```
### Step 2.1 Download the Sample Project file for Java
Click [here](/repository/downloadGithubFile?repository=https://github.com/juspay/juspay-sdk-integration-demo/archive/refs/heads/expresscheckout-java-sdk.zip) or click on the ‘Download’ button on the top right hand side of the page
#### Code Snippets: -
#### Java Code Snippet:
```java
{
"MERCHANT_ID":"YOUR_MERCHANT_ID",
"PRIVATE_KEY_PATH":"~/Desktop/JuspayBackendKit/src/main/resources/private-key.pem",
"PUBLIC_KEY_PATH":"~/Desktop/JuspayBackendKit/src/main/resources/public-key.pem",
"KEY_UUID":"YOUR_KEY_ID",
"PAYMENT_PAGE_CLIENT_ID": "YOUR_PAYMENY_PAGE_CLIENT_ID"
}
```
### Step 2.2 Input File Paths for Keys in 'config.json' file
**Option 1** -
Step 1 : Open the Java project in your Java environment and **replace** the config.json file already present in the project folder **(JuspayBackendKit/src/main/resources)** with the config.json file downloaded from the dashboard
Step 2 : Add your private key (‘**privateKey.pem’)** and Juspay’s public key **(‘key_91e09ab9d5154f569bb2b4ac54d6ee7f.pem’ )** to the**** Java project folder **(JuspayBackendKit/src/main/resources)**
**Option 2** - Open the Java project in your Java environment and input the file paths in following keys:
| Parameter | Description |
|---|---|
| PRIVATE_KEY_PATH | Add the absolute file path for your private key |
| PUBLIC_KEY_PATH | Add the absolute file path for Juspay's public key obtained from the dashboard |
| KEY_UUID | Add the Key_Uuid present in the dashboard |
| MERCHANT_ID | Add the Merchant_ID provided by Juspay |
| PAYMENT_PAGE_CLIENT_ID | Add the Client_ID provided by Juspay. Kindly reach out to JUSPAY SPOC in case of queries. |
#### Code Snippets: -
#### Java Code Snippet:
```java
{
"MERCHANT_ID":"YOUR_MERCHANT_ID",
"PRIVATE_KEY_PATH":"~/Desktop/JuspayBackendKit/src/main/resources/private-key.pem",
"PUBLIC_KEY_PATH":"~/Desktop/JuspayBackendKit/src/main/resources/public-key.pem",
"KEY_UUID":"YOUR_KEY_ID",
"PAYMENT_PAGE_CLIENT_ID": "YOUR_PAYMENY_PAGE_CLIENT_ID"
}
```
### Step 2.3 Check the prerequisites
Check if the below mentioned prerequisites are in place:
* Java sdk >= 8
* Maven
* JAVA_HOME path configured
#### Code Snippets: -
#### Java Code Snippet:
```java
# Juspay Sample App
Sample app for juspay java integration using expresscheckout-java-sdk
# Prerequisites
- Java sdk >= 8
- Maven
- JAVA_HOME path configured
# Setup Configurations
Place your config.json file in src/main/resources folder. Here's the sample for config.json file.
```json
{
"MERCHANT_ID":"YOUR_MERCHANT_ID",
"PRIVATE_KEY_PATH":"~/Desktop/JuspayBackendKit/src/main/resources/private-key.pem",
"PUBLIC_KEY_PATH":"~/Desktop/JuspayBackendKit/src/main/resources/public-key.pem",
"KEY_UUID":"YOUR_KEY_UUID",
"PAYMENT_PAGE_CLIENT_ID": "YOUR_PAYMENT_PAGE_CLIENT_ID"
}
```
You can skip giving `PUBLIC_KEY_PATH` and `PRIVATE_KEY_PATH` and add `private-key.pem` and `public-key.pem` inside resources' folder.
Note:- key file path has to be absolute.
## Run Application
The app is made using Servlets. Hence, multiple ways to run the application.
[//]: # (block:start:run-server)
### Quick run using `setup.sh`
```bash
chmod +x ./setup.sh
./setup.sh
```
### Quick run using jetty
```bash
mvn clean install
mvn clean package
mvn jetty:run
```
[//]: # (block:end:run-server)
# Want to add inside your own project (Servlet based project)
Please find `in.juspaybackendkit` package and copy it to your own setup. Now that we have added skd code in the project we'll configure web.xml
Add this in your web.xml file. It may defer depending upon your own setup.
```xml
in.juspaybackendkit.JuspayConfig
InitiateJuspayPayment
in.juspaybackendkit.InitiateJuspayPayment
HandleJuspayResponse
in.juspaybackendkit.HandleJuspayResponse
InitiateJuspayPayment
/initiateJuspayPayment
HandleJuspayResponse
/handleJuspayResponse
```
Add dependencies to your project.
```xml
in.juspay
expresscheckout
1.3.3
javax.xml.bind
jaxb-api
2.4.0-b180830.0359
```
```
### Step 2.4 Run the server
For Linux systems, quick run using ‘setup.sh’ file
`chmod +x ./setup.sh`
`./setup.sh`
For other systems, use Jetty to run the following:
`mvn clean install`
`mvn clean package`
`mvn jetty:run`
#### Code Snippets: -
#### Java Code Snippet:
```java
# Juspay Sample App
Sample app for juspay java integration using expresscheckout-java-sdk
# Prerequisites
- Java sdk >= 8
- Maven
- JAVA_HOME path configured
# Setup Configurations
Place your config.json file in src/main/resources folder. Here's the sample for config.json file.
```json
{
"MERCHANT_ID":"YOUR_MERCHANT_ID",
"PRIVATE_KEY_PATH":"~/Desktop/JuspayBackendKit/src/main/resources/private-key.pem",
"PUBLIC_KEY_PATH":"~/Desktop/JuspayBackendKit/src/main/resources/public-key.pem",
"KEY_UUID":"YOUR_KEY_UUID",
"PAYMENT_PAGE_CLIENT_ID": "YOUR_PAYMENT_PAGE_CLIENT_ID"
}
```
You can skip giving `PUBLIC_KEY_PATH` and `PRIVATE_KEY_PATH` and add `private-key.pem` and `public-key.pem` inside resources' folder.
Note:- key file path has to be absolute.
## Run Application
The app is made using Servlets. Hence, multiple ways to run the application.
[//]: # (block:start:run-server)
### Quick run using `setup.sh`
```bash
chmod +x ./setup.sh
./setup.sh
```
### Quick run using jetty
```bash
mvn clean install
mvn clean package
mvn jetty:run
```
[//]: # (block:end:run-server)
# Want to add inside your own project (Servlet based project)
Please find `in.juspaybackendkit` package and copy it to your own setup. Now that we have added skd code in the project we'll configure web.xml
Add this in your web.xml file. It may defer depending upon your own setup.
```xml
in.juspaybackendkit.JuspayConfig
InitiateJuspayPayment
in.juspaybackendkit.InitiateJuspayPayment
HandleJuspayResponse
in.juspaybackendkit.HandleJuspayResponse
InitiateJuspayPayment
/initiateJuspayPayment
HandleJuspayResponse
/handleJuspayResponse
```
Add dependencies to your project.
```xml
in.juspay
expresscheckout
1.3.3
javax.xml.bind
jaxb-api
2.4.0-b180830.0359
```
```
### Step 2.1 Download the Sample Project file for .NET
Click [here](/repository/downloadGithubFile?repository=https://github.com/juspay/juspay-sdk-integration-demo/archive/refs/heads/expresscheckout-dotnet-sdk.zip) or on the ‘Download’ button on the top right hand side of the page
#### Code Snippets: -
#### .NET Code Snippet:
```.net
# How to use this repo#
### What is this repository for? ###
* This repo is being used for Juspay Documentation made using tesseract repo
* This directory contains demo integration project for Juspay's suite of products
Refer to our [Developer Docs](https://docs.juspay.in/) for details around the integration process.
### Maintained Examples
| Folder Name | Product | Platform |
|------------------------------|------------------------------------------|--------------------------------------------|
| api-reference | Collection of APIs used across products | Agnostic |
| ec-headless-sample | Express Checkout SDK | Andriod, iOS, Flutter, React, Cordova |
| payment-page-android | Payment Page | Android |
| payment-page-ios | Payment Page | iOS |
| payment-page-web | Payment Page | Web |
| payment-page-flutter | Payment Page | Flutter |
| payment-page-cordova | Payment page | Cordova |
| payment-page-react-native | Payment page | React Native |
| payment-page-payment-locking | Payment locking feature for Payment Page | Andriod, iOS, Flutter, React, Cordova |
| payv3-forms | payv3 | Web |
| payment-page-sample-payload | Sample payload for payment page | Andriod, iOS, Flutter, React, Cordova, Web |
### How do I get set up? ###
* This repo is used to show the code section of the documentation.
### Contribution guidelines ###
* If you want to add any new product and/or platform. please follow the below steps.
1. All the code content of a particular platform of a product is kept in a branch "productName" + "-" + "platformName".
Let suppose you are adding code for platform android in the product payment-page then the name of the branch will be
payment-page-android
2. And payment-page-android code have both Java and Kotlin so there will be two folders named accordingly and each folder should contain their demo code.
```
### Step 2.2 Input File Paths for Keys in 'config.json' file
**Option 1** -
Step 1 : Open the .NET project in your .NET environment and **replace** the config.json file already present in the project folder (expresscheckout-dotnet-framework-sdk) with the config.json file downloaded from the dashboard
Step 2 : Add your private key (‘**privateKey.pem’)** and Juspay’s public key **(‘key_91e09ab9d5154f569bb2b4ac54d6ee7f.pem’ )** to the**.NET** project folder (expresscheckout-dotnet-framework-sdk)
**Option 2** - Open the .NET project in your .NET environment and input the file paths in following keys:
| Parameter | Description |
|---|---|
| PRIVATE_KEY_PATH | Add the absolute file path for your private key |
| PUBLIC_KEY_PATH | Add the absolute file path for Juspay's public key obtained from the dashboard |
| KEY_UUID | Add the Key_Uuid present in the dashboard |
| MERCHANT_ID | Add the Merchant_ID provided by juspay |
| PAYMENT_PAGE_CLIENT_ID | Add the Client_ID provided by Juspay. Kindly reach out to JUSPAY SPOC in case of queries. |
#### Code Snippets: -
#### .NET Code Snippet:
```.net
{"success":false,"message":"No Data found for the given path"}
```
### Step 2.3 Update your .NET version
Run the following command with your .NET version (net7.0/net6.0/net5.0):
`dotnet run -f net7.0`
#### Code Snippets: -
#### .NET Code Snippet:
```.net
# How to use this repo#
### What is this repository for? ###
* This repo is being used for Juspay Documentation made using tesseract repo
* This directory contains demo integration project for Juspay's suite of products
Refer to our [Developer Docs](https://docs.juspay.in/) for details around the integration process.
### Maintained Examples
| Folder Name | Product | Platform |
|------------------------------|------------------------------------------|--------------------------------------------|
| api-reference | Collection of APIs used across products | Agnostic |
| ec-headless-sample | Express Checkout SDK | Andriod, iOS, Flutter, React, Cordova |
| payment-page-android | Payment Page | Android |
| payment-page-ios | Payment Page | iOS |
| payment-page-web | Payment Page | Web |
| payment-page-flutter | Payment Page | Flutter |
| payment-page-cordova | Payment page | Cordova |
| payment-page-react-native | Payment page | React Native |
| payment-page-payment-locking | Payment locking feature for Payment Page | Andriod, iOS, Flutter, React, Cordova |
| payv3-forms | payv3 | Web |
| payment-page-sample-payload | Sample payload for payment page | Andriod, iOS, Flutter, React, Cordova, Web |
### How do I get set up? ###
* This repo is used to show the code section of the documentation.
### Contribution guidelines ###
* If you want to add any new product and/or platform. please follow the below steps.
1. All the code content of a particular platform of a product is kept in a branch "productName" + "-" + "platformName".
Let suppose you are adding code for platform android in the product payment-page then the name of the branch will be
payment-page-android
2. And payment-page-android code have both Java and Kotlin so there will be two folders named accordingly and each folder should contain their demo code.
```
### Step 2.4 Test the payment flow
Load the website ([localhost:5000](http://localhost:5000)) on any browser to test the payment flow
#### Code Snippets: -
#### .NET Code Snippet:
```.net
# How to use this repo#
### What is this repository for? ###
* This repo is being used for Juspay Documentation made using tesseract repo
* This directory contains demo integration project for Juspay's suite of products
Refer to our [Developer Docs](https://docs.juspay.in/) for details around the integration process.
### Maintained Examples
| Folder Name | Product | Platform |
|------------------------------|------------------------------------------|--------------------------------------------|
| api-reference | Collection of APIs used across products | Agnostic |
| ec-headless-sample | Express Checkout SDK | Andriod, iOS, Flutter, React, Cordova |
| payment-page-android | Payment Page | Android |
| payment-page-ios | Payment Page | iOS |
| payment-page-web | Payment Page | Web |
| payment-page-flutter | Payment Page | Flutter |
| payment-page-cordova | Payment page | Cordova |
| payment-page-react-native | Payment page | React Native |
| payment-page-payment-locking | Payment locking feature for Payment Page | Andriod, iOS, Flutter, React, Cordova |
| payv3-forms | payv3 | Web |
| payment-page-sample-payload | Sample payload for payment page | Andriod, iOS, Flutter, React, Cordova, Web |
### How do I get set up? ###
* This repo is used to show the code section of the documentation.
### Contribution guidelines ###
* If you want to add any new product and/or platform. please follow the below steps.
1. All the code content of a particular platform of a product is kept in a branch "productName" + "-" + "platformName".
Let suppose you are adding code for platform android in the product payment-page then the name of the branch will be
payment-page-android
2. And payment-page-android code have both Java and Kotlin so there will be two folders named accordingly and each folder should contain their demo code.
```
### Step 2.1 Download the Sample Project file for Node JS
Click [here](/repository/downloadGithubFile?repository=https://github.com/juspay/juspay-sdk-integration-demo/archive/refs/heads/expresscheckout-dotnet-sdk.zip) or on the ‘Download’ button on the top right hand side of the page
#### Code Snippets: -
#### Node JS Code Snippet:
```node js
# Setup script
- run ```npm i``` to install all system dependency
# How to run server
- update configuration in config.json file
- run ```npm start``` to run the server
- In browser load the website (localhost:5000)
# How to run standalone service
- update configuration in config.json file
- run ```npm install```
- run ```npm start```
```
### Step 2.2 Input File Paths for Keys in 'config.json' file
**Option 1** -
Step 1 : Open the Node JS project in your Node JS environment and **replace** the config.json file already present in the project folder with the config.json file downloaded from the dashboard
Step 2 : Add your private key (‘**privateKey.pem’)** and juspay’s public key **(‘key_91e09ab9d5154f569bb2b4ac54d6ee7f.pem’ )** to the**Node JS** project folder (expresscheckout-dotnet-framework-sdk)
**Option 2** - Open the Node JS project in your Node JS environment and input the file paths in following keys:
| Parameter | Description |
|---|---|
| PRIVATE_KEY_PATH | Add the absolute file path for your private key |
| PUBLIC_KEY_PATH | Add the absolute file path for juspay's public key obtained from the dashboard |
| KEY_UUID | Add the Key_Uuid present in the dashboard |
| MERCHANT_ID | Add the Merchant_ID provided by juspay |
| PAYMENT_PAGE_CLIENT_ID | Add the Client_ID provided by Juspay. Kindly reach out to JUSPAY SPOC in case of queries. |
#### Code Snippets: -
#### Node JS Code Snippet:
```node js
{
"MERCHANT_ID":"YOUR_MERCHANT_ID",
"PRIVATE_KEY_PATH":"privateKey.pem",
"PUBLIC_KEY_PATH":"public-key.pem",
"KEY_UUID":"YOUR_KEY_ID",
"PAYMENT_PAGE_CLIENT_ID": "YOUR_PAYMENY_PAGE_CLIENT_ID"
}
```
### Step 2.3 Install System Dependencies
Run **‘npm i’** to install all the system dependencies
#### Code Snippets: -
#### Node JS Code Snippet:
```node js
{
"MERCHANT_ID":"YOUR_MERCHANT_ID",
"PRIVATE_KEY_PATH":"privateKey.pem",
"PUBLIC_KEY_PATH":"public-key.pem",
"KEY_UUID":"YOUR_KEY_ID",
"PAYMENT_PAGE_CLIENT_ID": "YOUR_PAYMENY_PAGE_CLIENT_ID"
}
```
### Step 2.4 Run the Server
1. run **‘npm start’** to run the server
2. In browser load the website ([localhost:5000](http://localhost:5000))
#### Code Snippets: -
#### Node JS Code Snippet:
```node js
{
"MERCHANT_ID":"YOUR_MERCHANT_ID",
"PRIVATE_KEY_PATH":"privateKey.pem",
"PUBLIC_KEY_PATH":"public-key.pem",
"KEY_UUID":"YOUR_KEY_ID",
"PAYMENT_PAGE_CLIENT_ID": "YOUR_PAYMENY_PAGE_CLIENT_ID"
}
```