

Apple Pay
“An easier way to pay within apps and websites”
Apple Pay provides an easy and secure way to make payments in your iOS, iPadOS, and watchOS apps, and on websites in Safari. And now, Apple Pay can also be used in Messages for Business and in iMessage extensions.
Checkout is just a tap away using Face ID, Touch ID, or double-clicking Apple Watch, users can quickly and securely provide their payment, shipping, and contact information to check out. Customers love the simplicity of Apple Pay, and you’ll love the increased conversion rates and new user adoption that come with it.
Key Features
Express Checkout
Customers can complete their purchase from a product page with a single tap, without the need to add to a cart or fill out a form.
Data is More Secure
Accepting Apple Pay offers enhanced security compared to traditional cards. Transactions require Face ID, Touch ID, or a passcode (Apple Watch requires passcode entry upon being removed from the wrist). Importantly, merchants do not receive customers' actual card numbers, reducing the handling of sensitive data.
Compatibility Overview
Platforms Supported: Web, iOS
Supported Payment Gateways
CyberSource
Mastercard Payment Gateway Services (MPGS)
Supported Juspay Integrations :
Juspay HyperCheckout (Payment Page)
Juspay Express Checkout SDK (EC Headless SDK)
Juspay Express Checkout API
Apple Pay Supported Devices:
|
Device
|
Browser / Platform
|
Apple Pay
|
Authentication
|
|---|---|---|---|
MacBook
| Safari
| ✅
| Touch ID
|
MacBook
| Non-Safari
| ✅
| QR handoff to iPhone
|
iPhone
| Safari
| ✅
| Face ID
|
iPhone
| Non-Safari / App
| ✅
| Face ID
|
Non-Apple Device
| Any
| ❌
| Not Supported
|
For a comprehensive list of supported devices, refer to the Apple Pay documentation![]() .
.
Apple Pay – Web Checkout Journey
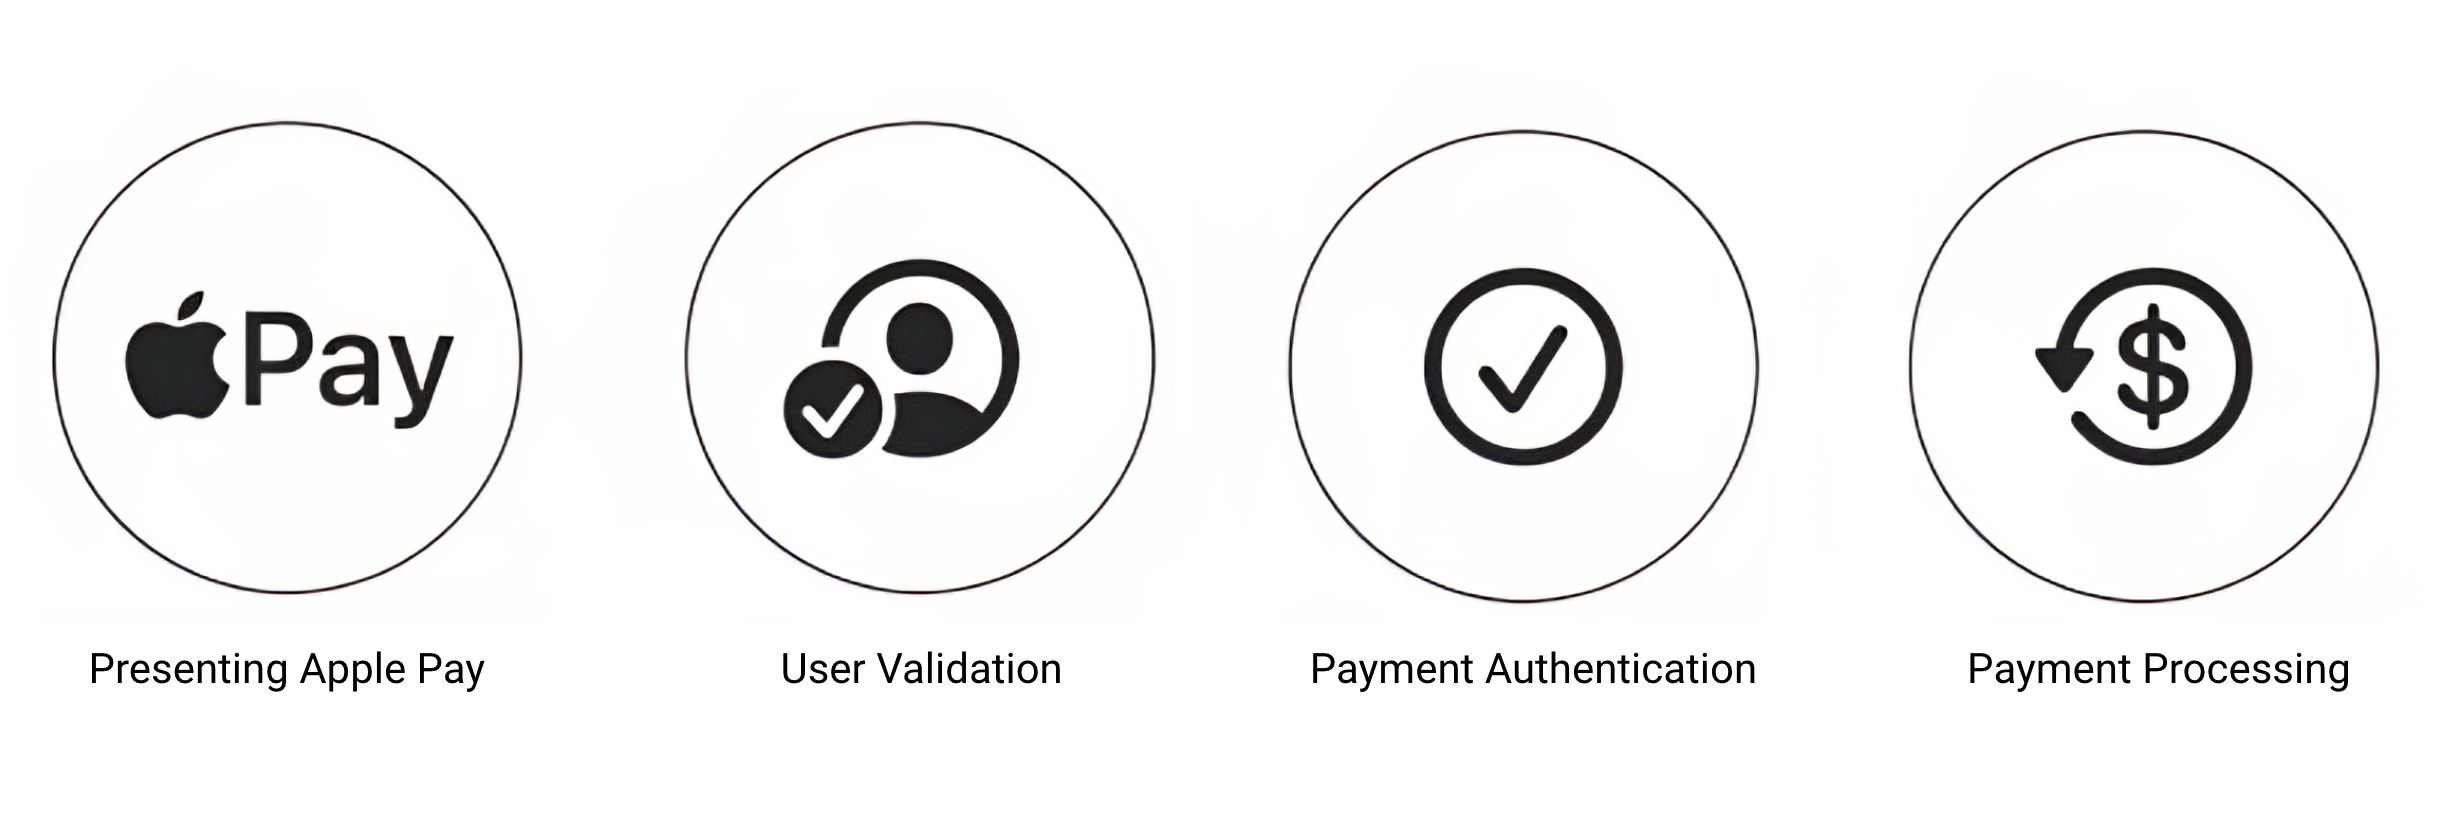
1. Presenting Apple Pay
The user selects Apple Pay as the payment method on your web checkout page. The system automatically checks if the user’s device and browser support Apple Pay (e.g., Safari on iPhone or Mac). If unsupported (e.g., Android or Windows), Apple Pay is not displayed.
2. User Validation
Once Apple Pay is selected and supported, the Apple Pay sheet is triggered. It displays pre-filled payment, shipping, and contact details from the user's Apple Wallet for user confirmation.
3. Payment Authentication
The user authenticates the payment using one of the following methods based on the device:
Face ID (iPhone, newer iPads)
Touch ID (MacBook/ Older iPhones)
QR handoff to iPhone (for Macs without Touch ID/ Non-Safari browser on macOS)
Passcode (When Biometric fails or is not enabled)
4. Payment Processing
After successful authentication, the payment is processed in real time. The user is then redirected to a payment success screen on the website.
Apple Pay Payment Journey (Video Demos)
Watch the Apple Pay payment flow in action across supported devices and scenarios.
1. Mobile (iPhone with Face ID)
This video shows how a user makes a payment using Apple Pay within the merchant’s mobile app on an iPhone. The user selects Apple Pay, authenticates with Face ID, and the payment is completed instantly.
2. Web – Payment via Safari on Mac (Touch ID)
This video shows how a user on a Mac using Safari browser pays with Apple Pay. The user selects Apple Pay and authenticates using Touch ID on the MacBook to complete the transaction.
3. Web – Payment via Non-Safari Browser (QR Handoff to iPhone)
This video shows how a user on a Mac using a non-Safari browser (like Chrome) completes a payment using Apple Pay. A QR code is shown on the screen, which the user scans with their iPhone to authenticate and finish the payment.
- Have questions?
- Need help? Contact support
- LLM? Read llms.txt