

Google Pay Set Up via Juspay’s Dashboard (Web)
Google Pay can be enabled in a few quick steps via the Juspay Dashboard, allowing you to offer fast, secure, and frictionless payments to your customers.
Prerequisites
Before configuring Google Pay in the Juspay Dashboard, you’ll need to set up your business in the Google Pay & Wallet Console![]() and accept the Terms of Service.
and accept the Terms of Service.
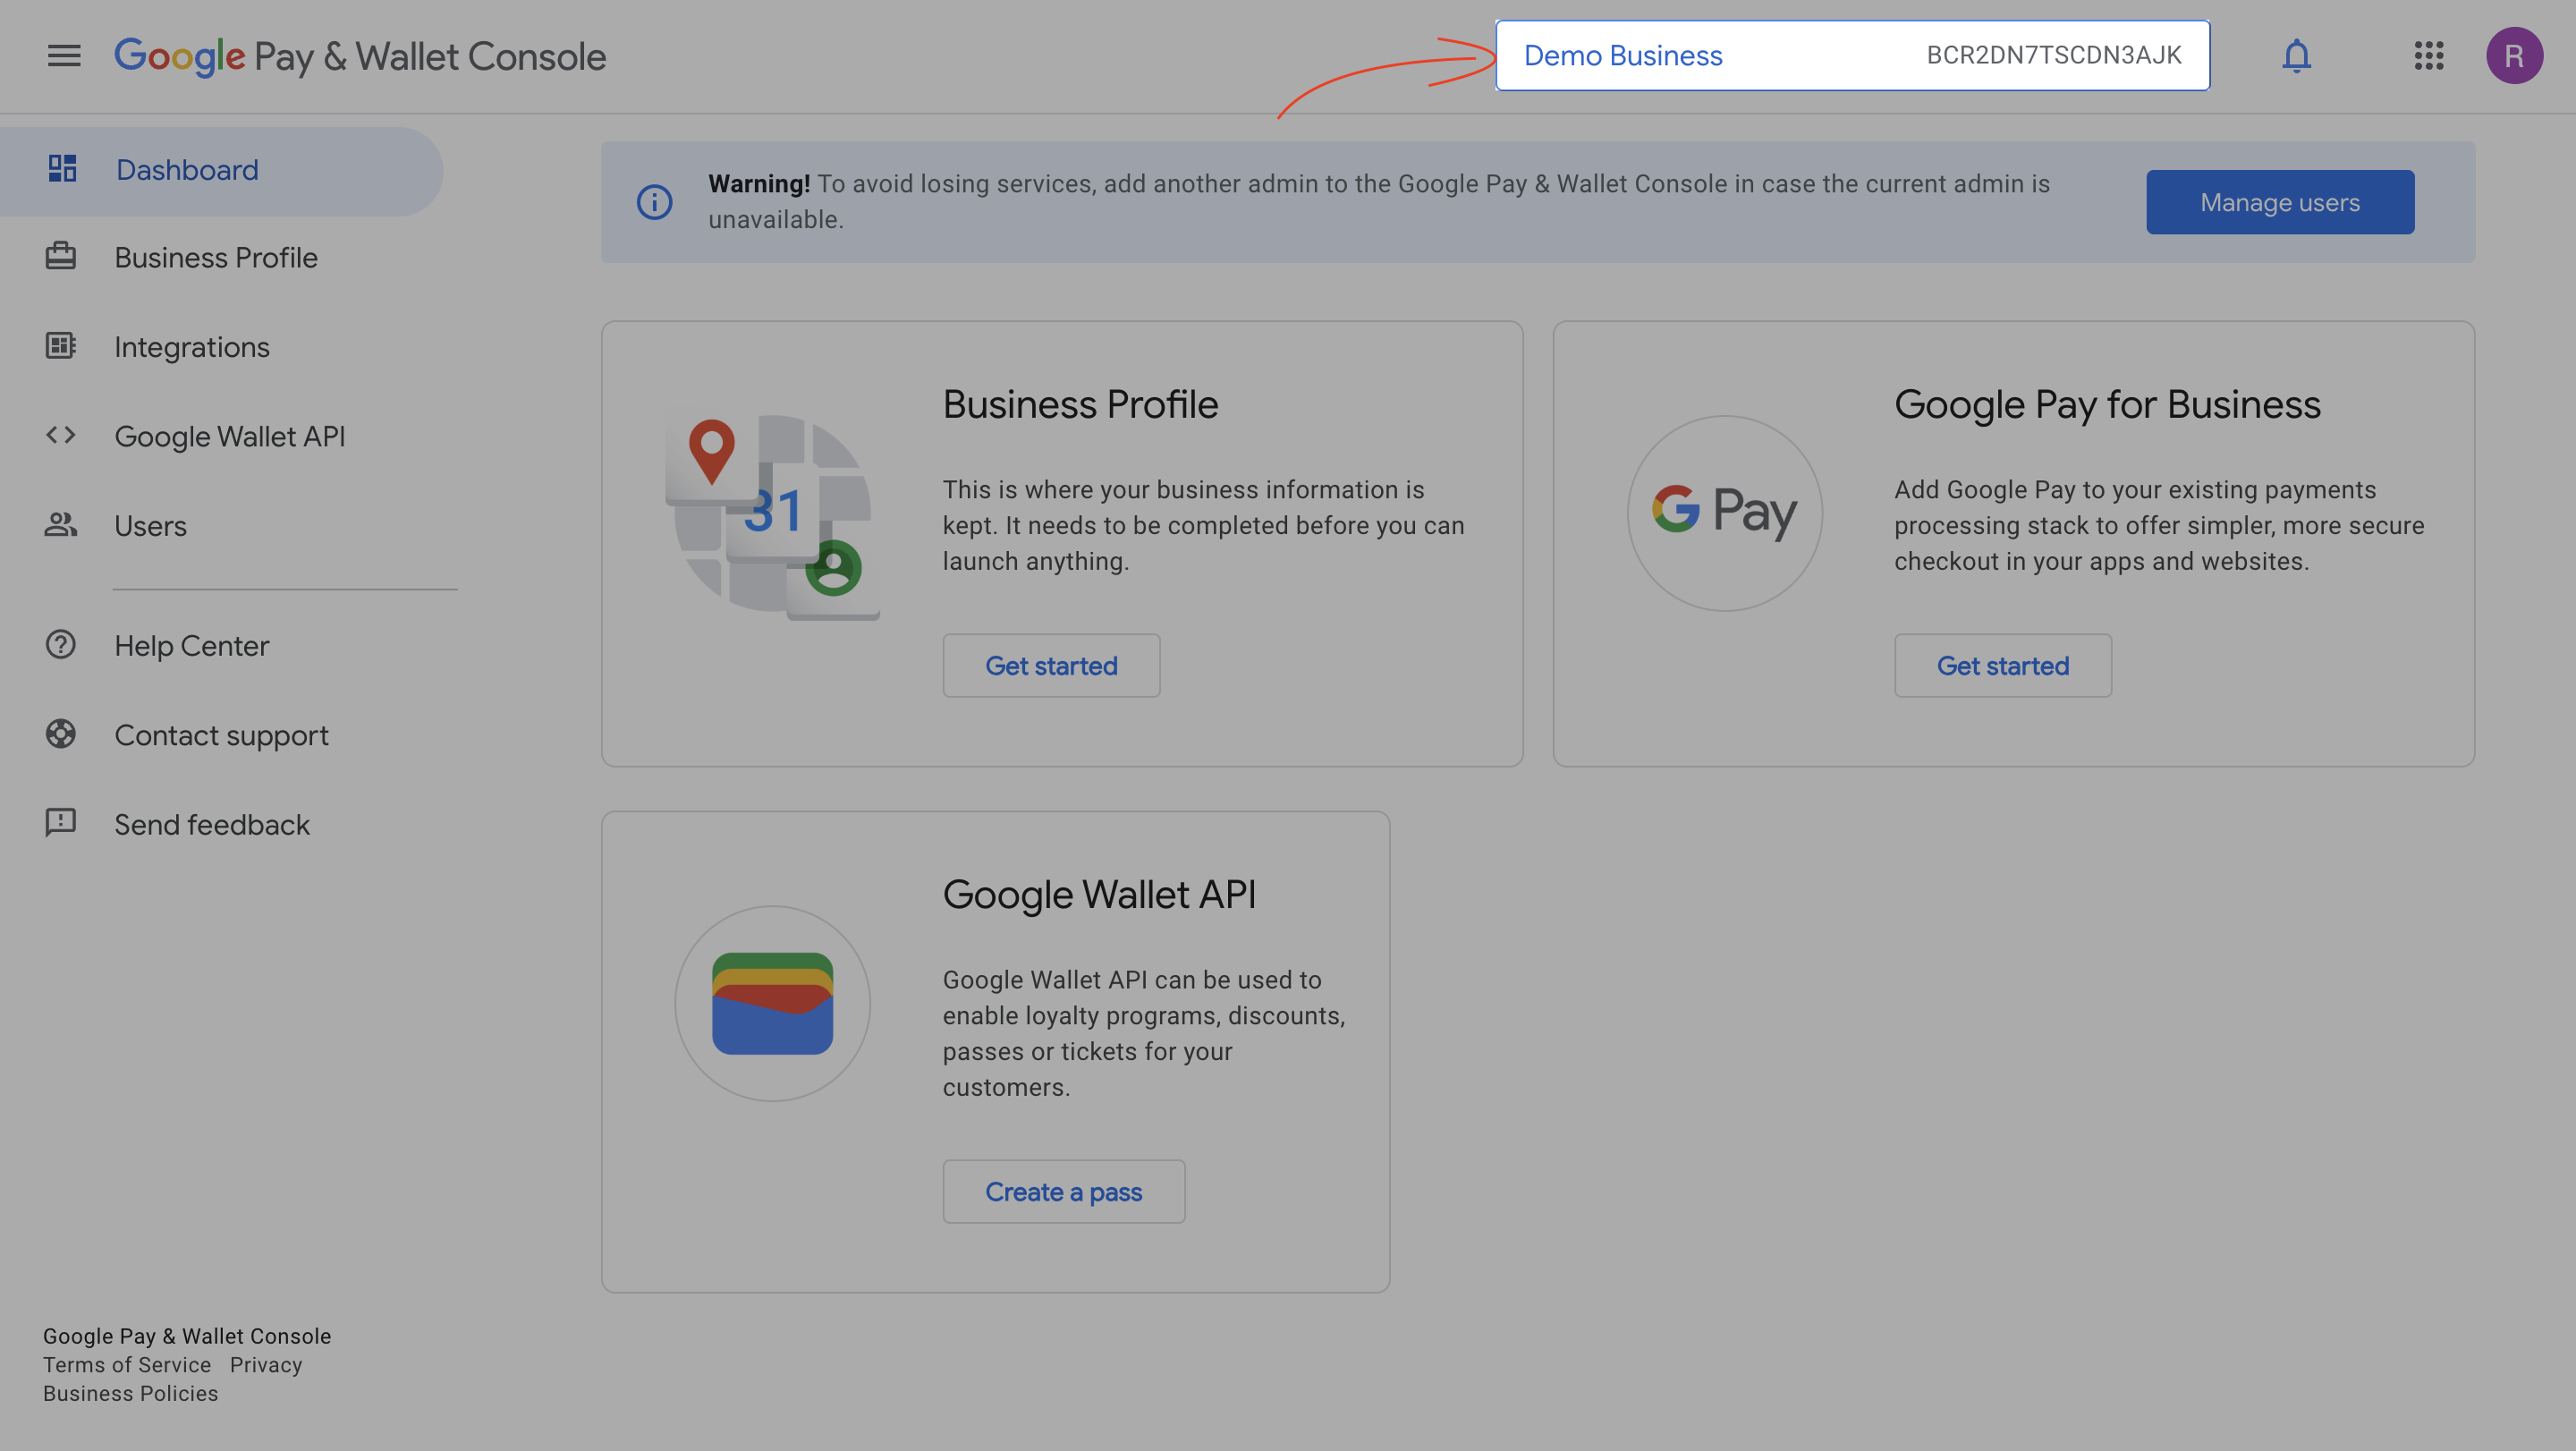
Once logged in, you can find the following details:
Google Pay Merchant ID
Displayed in the top-right corner of the console.
It is an alphanumeric code beginning with
BCR….
Google Pay Merchant Name
Shown alongside the Merchant ID in the top bar.
This is your registered business name (visible to customers in Google Pay).
Google Pay Setup in Juspay Dashboard
Once you have your Merchant Name and Merchant ID ready, follow the below steps in the Juspay Dashboard to complete the Google Pay Dashboard setup.
- Have questions?
- Need help? Contact support
- LLM? Read llms.txt